User Manual
This page is intended to give an overview of the Sensoworks platform and explain to the end user how to use it.
Index
- Context and Nomenclature
- User Management
- Networks
- Notifications
- Settings
- Configurations
- Edges
1. Context and Nomenclature
The Sensoworks platform is used to centralize the monitoring and control of IoT devices connected to it. The main use is to visualize raw data or build dashboards from which to extract insights. A brief introduction to the nomenclature used in the Sensoworks ecosystem:
-
Tenant: An instance of the application that serves a specific group of users with shared privileges. Each tenant operates in a logically isolated environment.
-
Network: Represents a physical structure like a bridge, building, or specific area. It encompasses various infrastructural elements monitored by the platform.
-
Thing: A node that groups a set of sensors. It can be identified as an infrastructural element like a pylon or arch, or as a control unit.
-
Device: The sensor itself, responsible for collecting specific data for monitoring purpose.
2. User Management
Overview
User is an entity that can log in to the Sensoworks IIoT Platform web interface, configure the environment, access devices and other entities if they have permissions to do so. Users are grouped into user roles.
By default, there are two auto generated user groups: the Tenant Administrators and the Tenant Users. Tenant Administrator can directly create new users and roles, including Tenant Users and has complete control over the system.
Roles and permissions
You can create your own custom roles accessing the “Roles and permissions” page available under “Users management” menu.
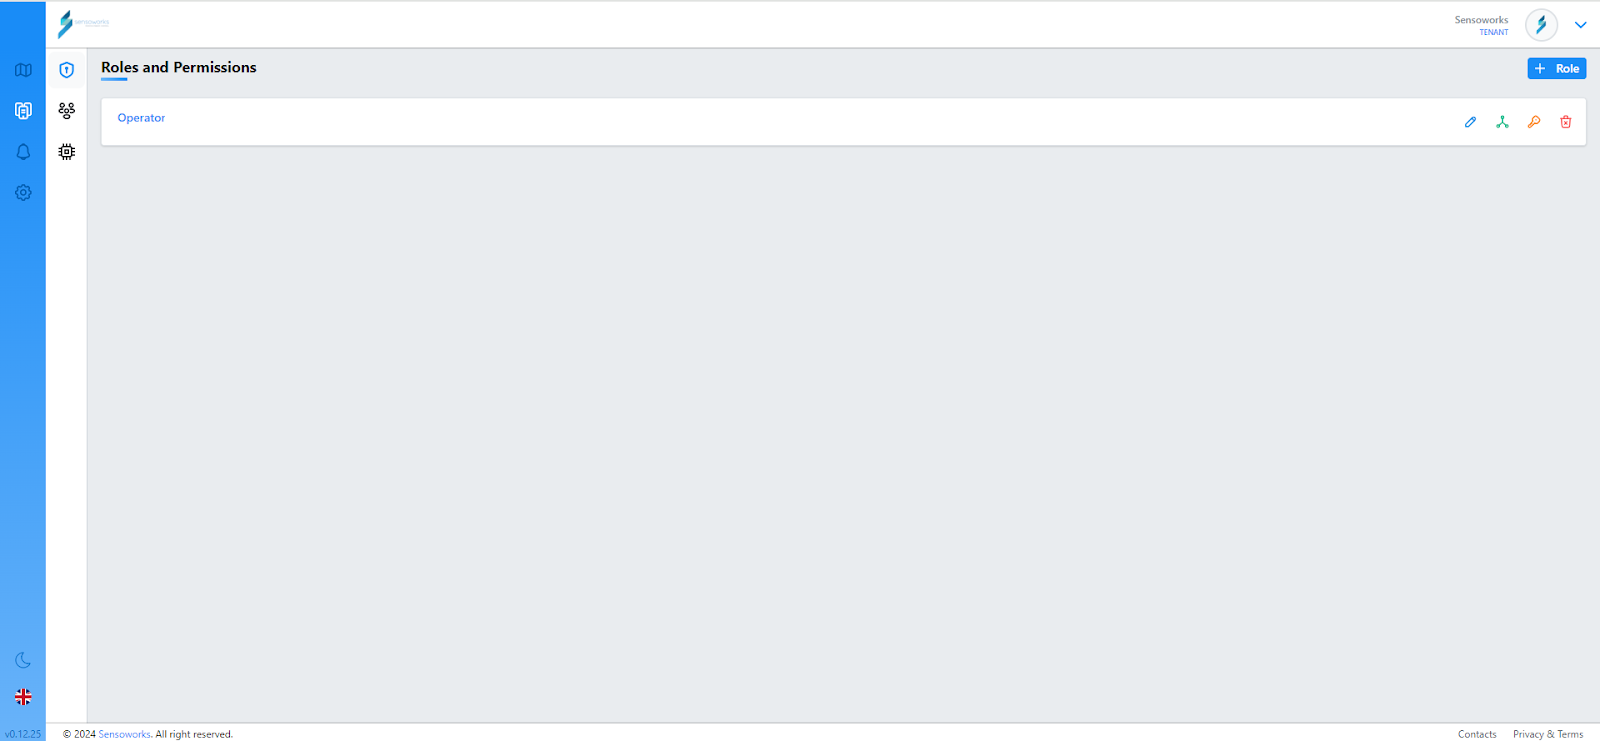
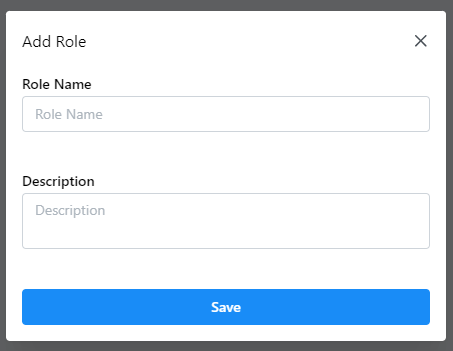
Sensoworks IIoT Platform allows you to create your own roles by clicking on the “+ Role” button in the top right corner. A role is made of a “Role Name” and “Description”.
Once a new role is created, you can manage permissions for all the users belonging to that role. You can just click on the role to access all the Sensoworks IIoT Platform available functionalities for which you want to manage permissions.
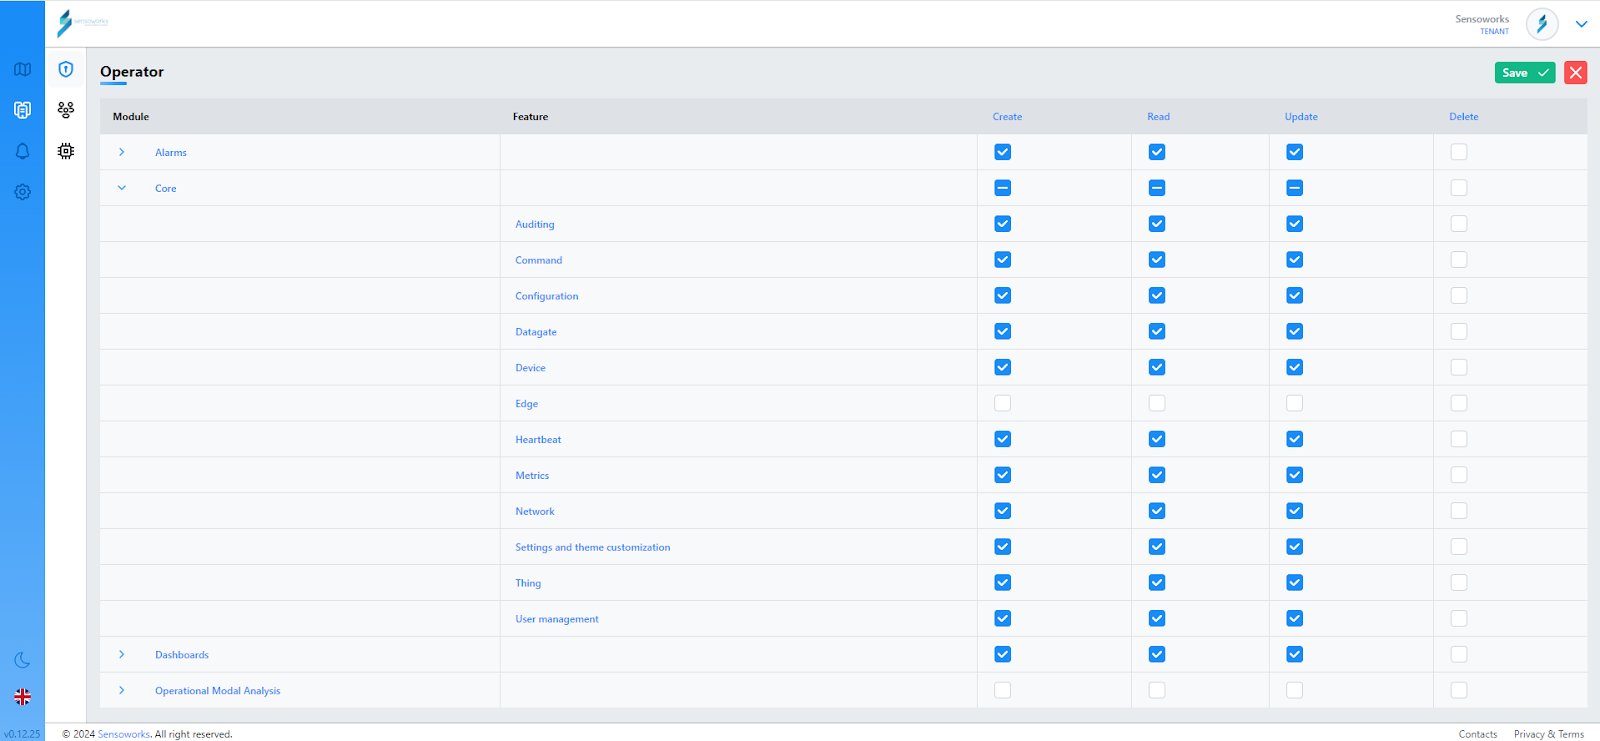
Managing permissions is quite simple. What you need to do is, for each Feature in a specific Module, enable or disable the permission. Permissions include Create, Read, Update, Delete.
Once you set permissions you can click on Save to apply the changes to that role.
Users
You can manage your users in Users page by clicking on “Users management” item on the left menu bar, then clicking on “Users”.
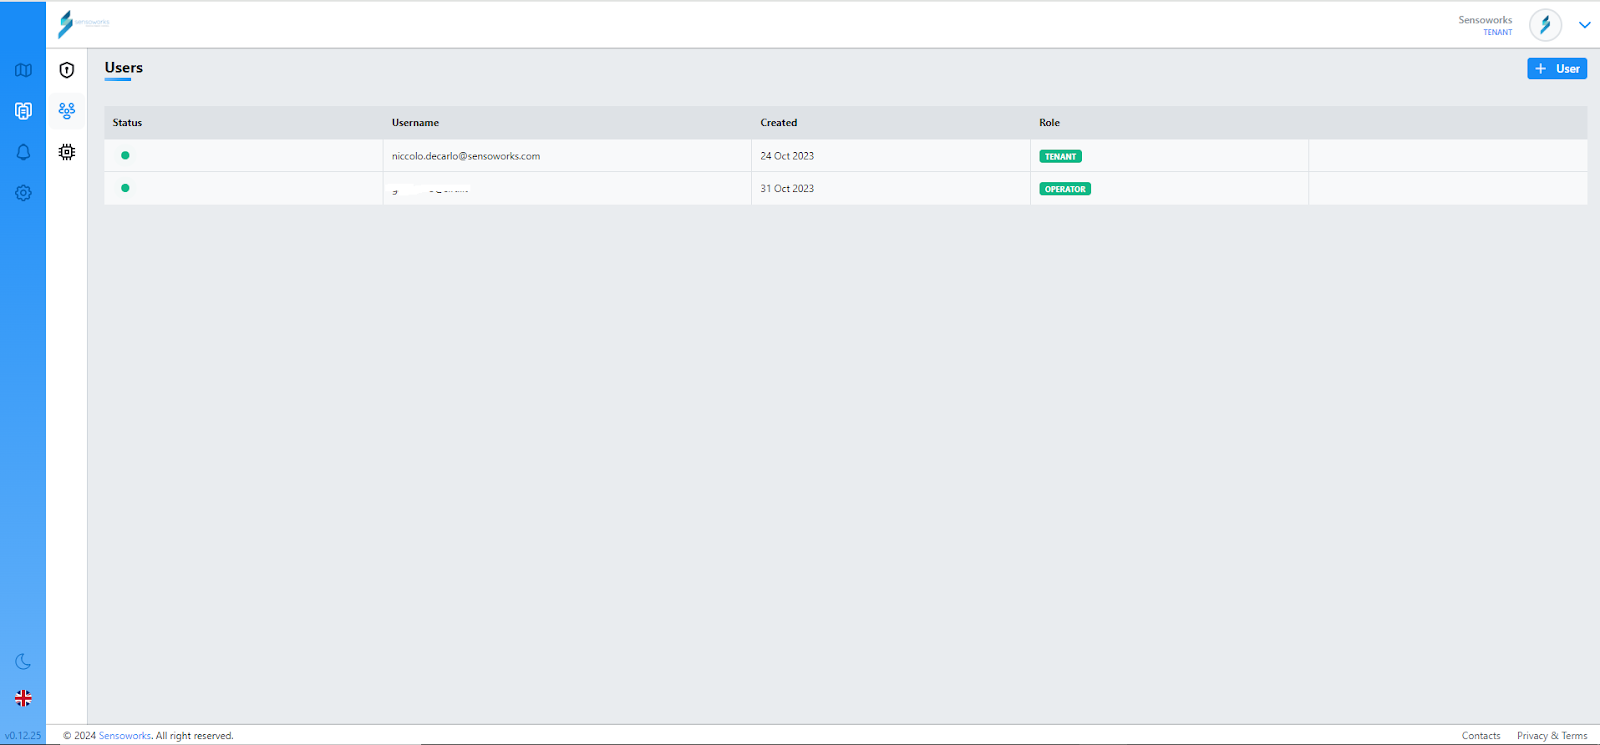
To create a new user just click on the “+ User” button in the top right corner. You can assign a Role and insert the Email address that will be the user name for that user needed to login.
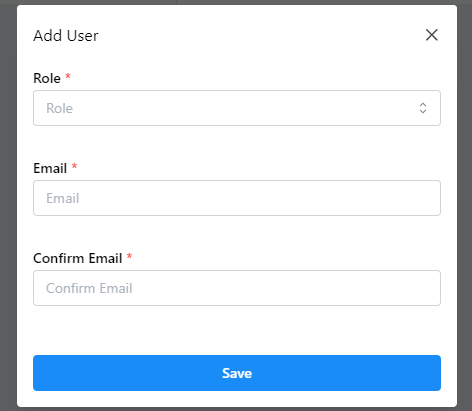
Click on Save at the end.
3. Networks
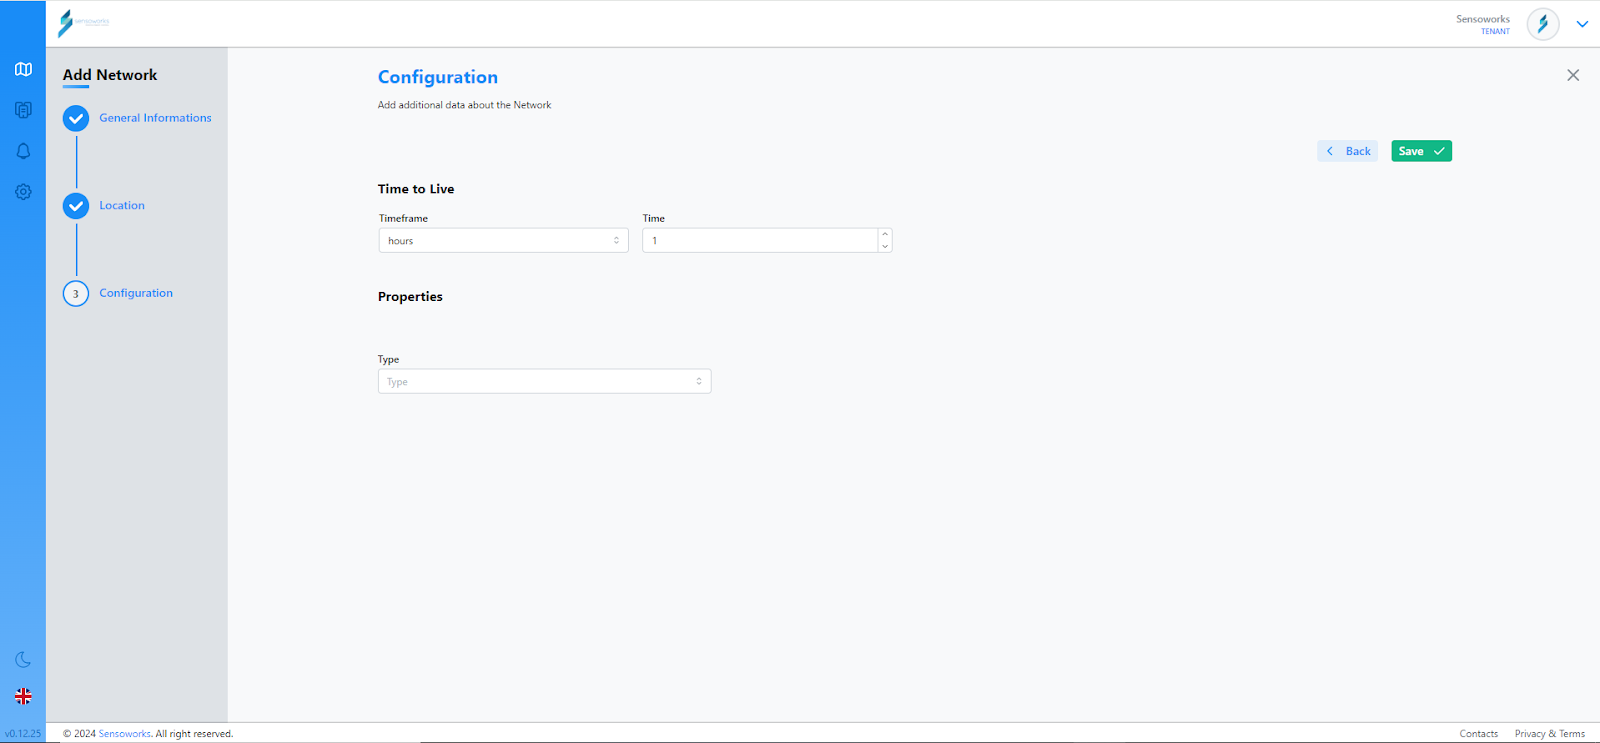
This is the home page after the user is logged in. You can see a list of networks and their geolocation (set during creation). Included in the table is information such as the id of the network in the Sensoworks system, its assigned name, and the number of associated things and devices. From the corresponding menu (the 3 dots in each row) it is possible to change some information regarding the network such as the name, the time to live (or TTL, which defines the retention of data in the platform), and whether or not to enable autoprovisioning (the functionality of the platform to create the registry of a new device the moment the first data is received without the need to have created it manually beforehand. From the same menu, it is also possible to assign users (previously created by the Tenant admin) to the following network or navigate directly to that network’s dashboard page.
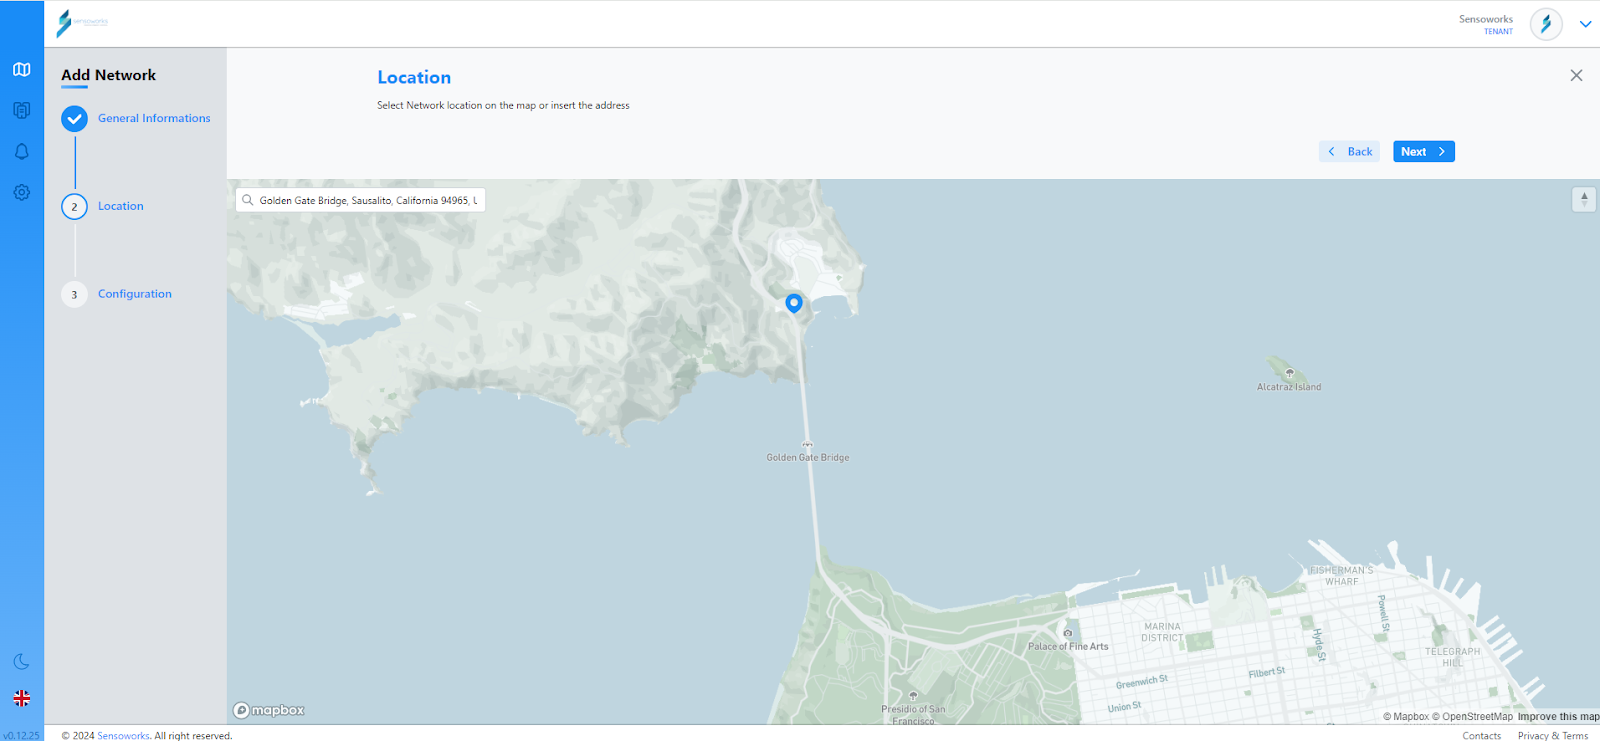
Creating a Network
The wizard asks you to create a Network. A Network represents a set of Things. A Thing represents a set of devices.
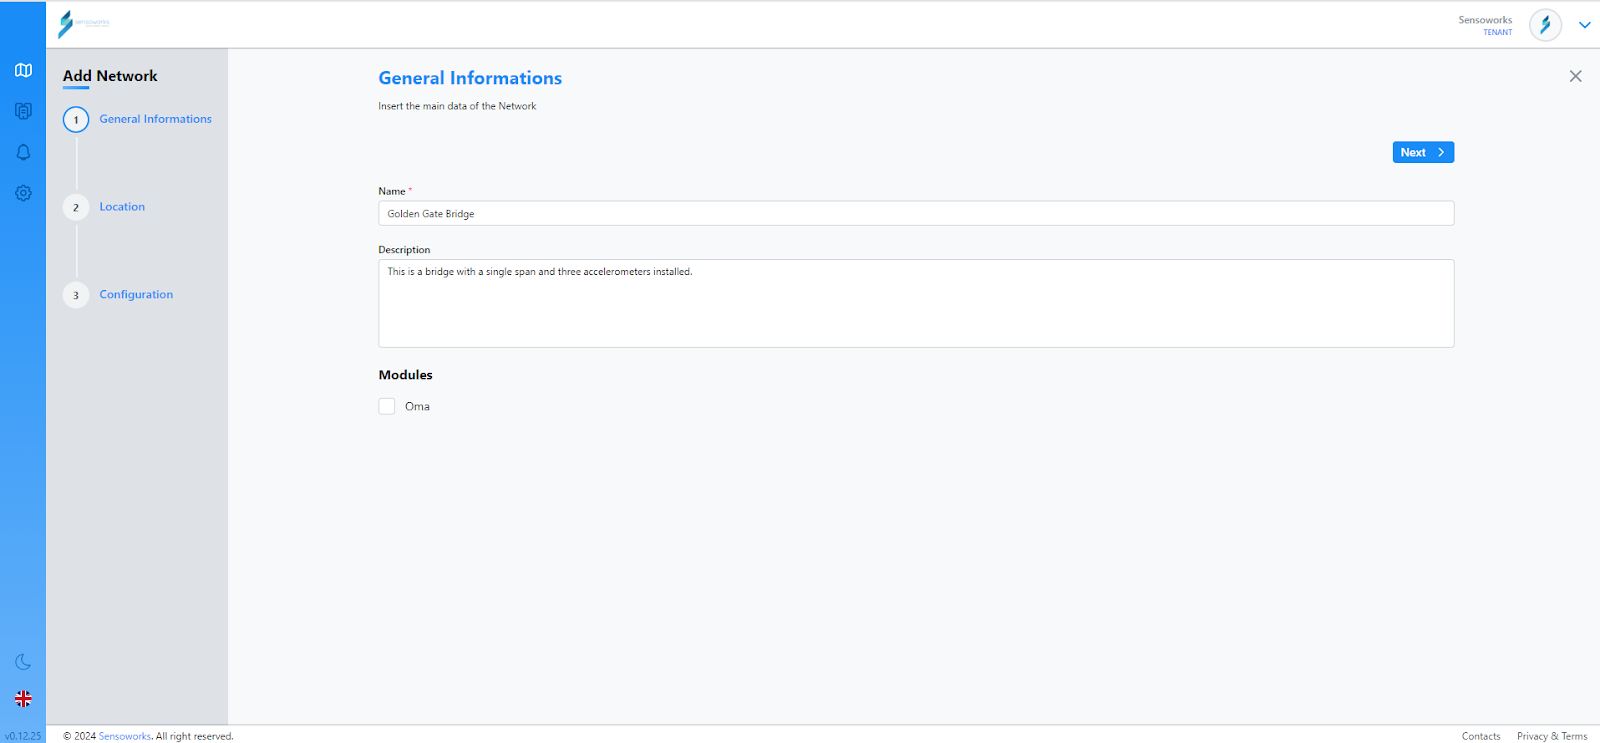 |  |  |
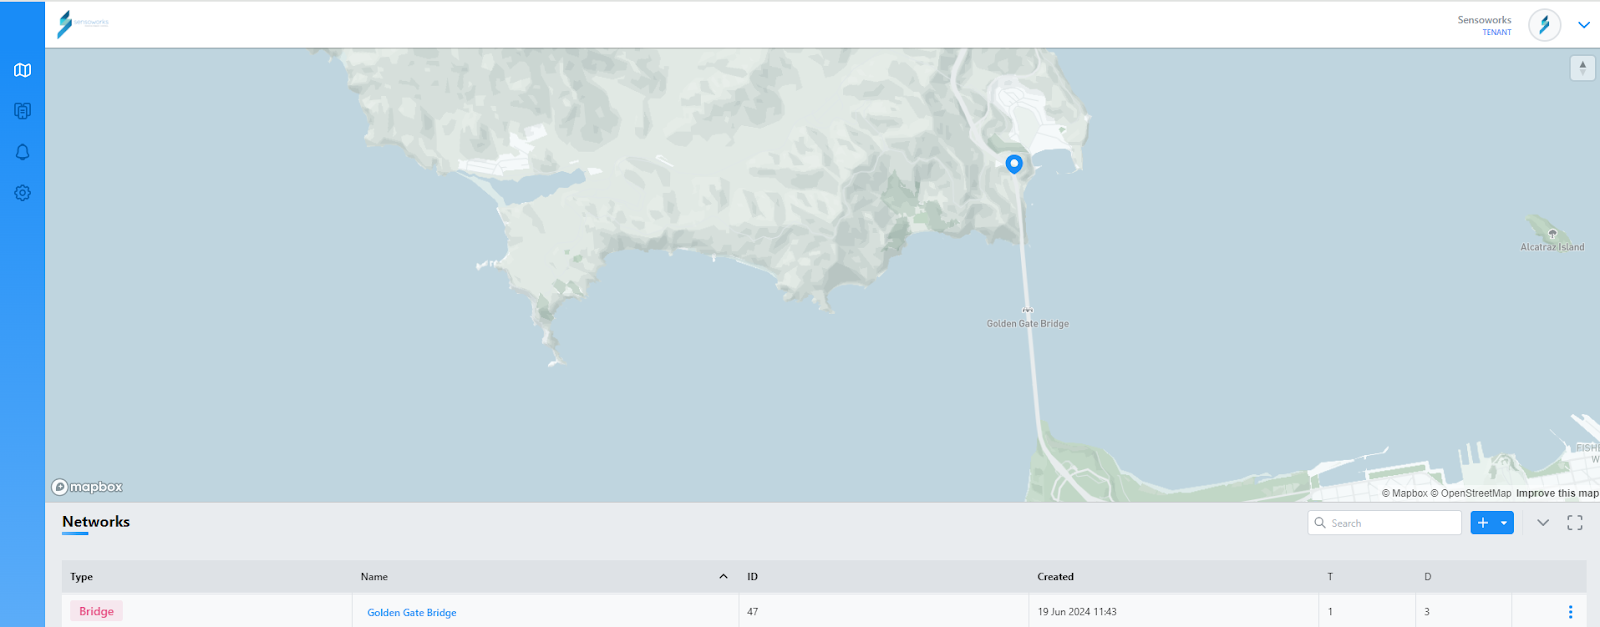
Once you click on “save” a Network called “Golden Gate Bridge” is created.
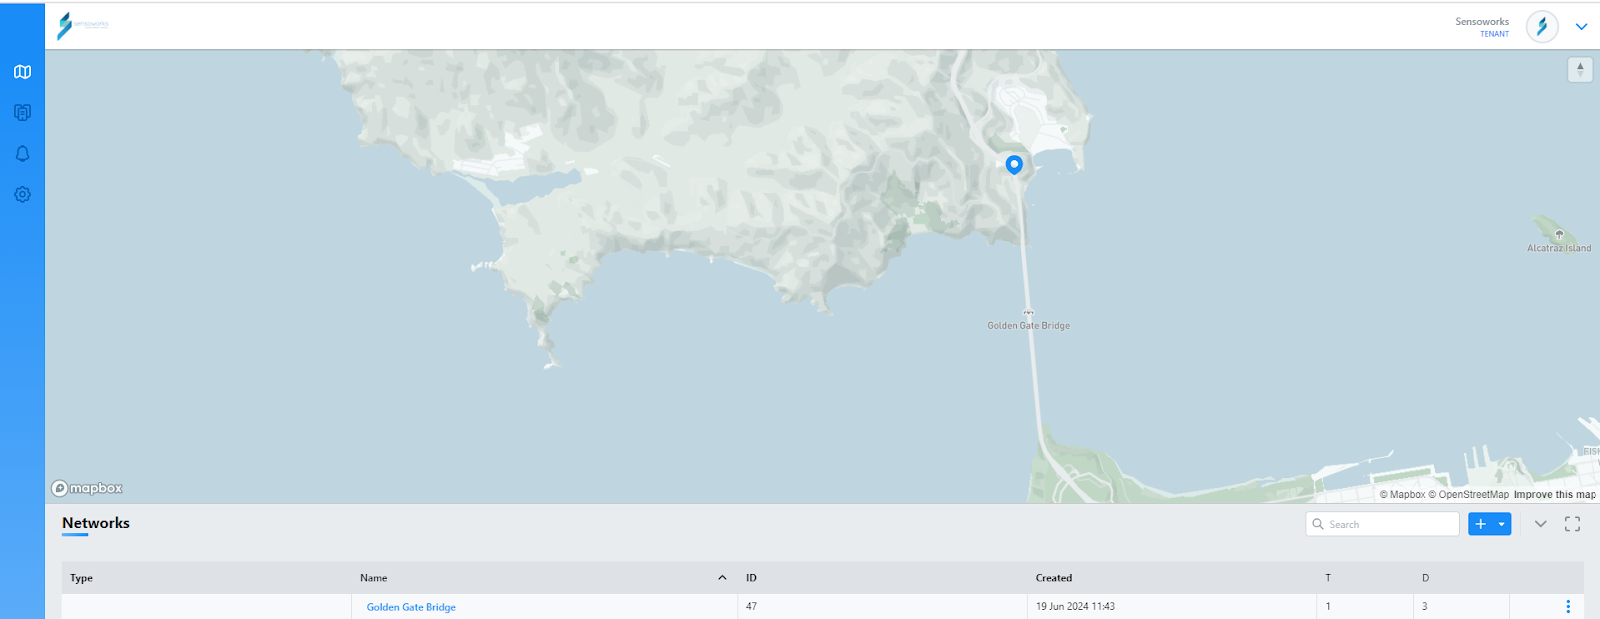
As you can see the Network “Golden Gate Bridge” is located on Golden Gate Bridge, San Francisco and has no Thing nor Devices attached to it. (columns “T” and “D” are 0).
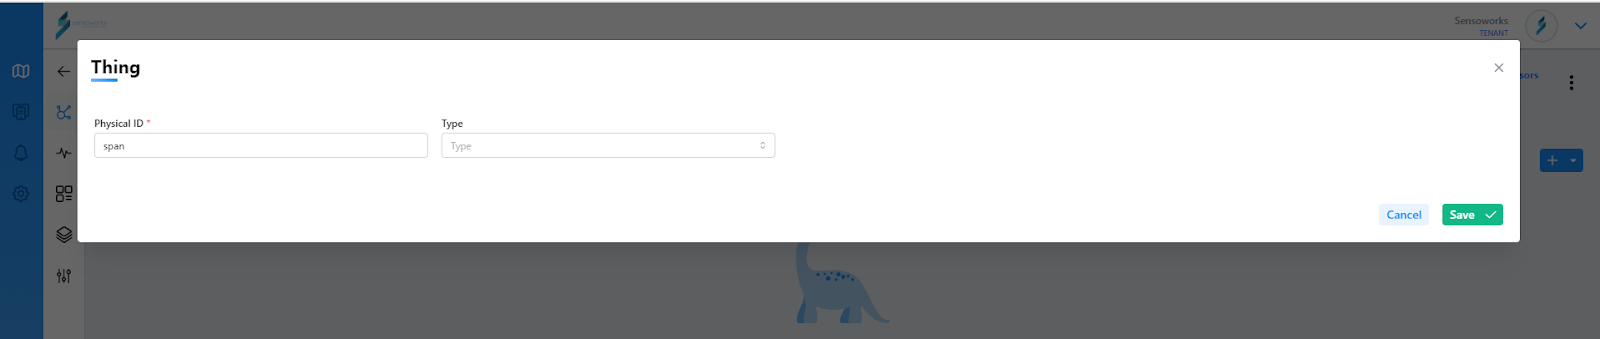
Creating a Thing
Creating a Thing called “span” inside the Network “Golden Gate Bridge” is quite easy. You can follow this steps:
-
click on the name of the new Network created “Golden Gate Bridge”;
-
click on the ”+” icon in the top right corner, then “Thing”;
-
assign a Physical ID, we use “span” as mentioned before;
-
click on Save.

Remember to enable the Thing by clicking on the toggle “Enabled”.
For the moment we leave aside the concept of “Type”. It is not relevant for this example.
Creating a Device
For the purpose of this example we’ll create three devices called “acc_1”, “acc_2”, “acc_3” that represent three accelerometers.You can follow these steps:
-
click on the name of the new Thing created “span”;
-
click on the ”+” icon in the top right corner, then “Sensor”;
-
assign a Physical ID, we use “acce_1” as mentioned before;
-
click on Save;

Repeat steps 2 to 4 to create the other two devices. Assign them a Physical ID like “acc_2” and “acc_3”.
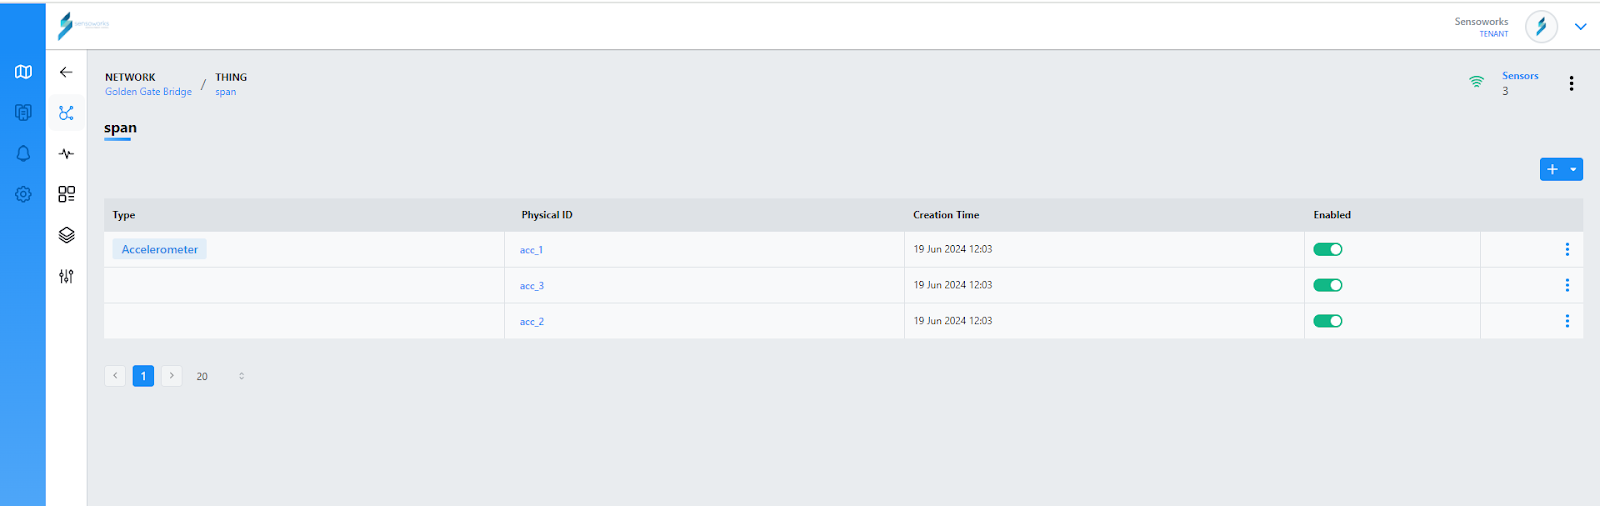
As a result of creating three devices we can see them attached to the Thing “span”
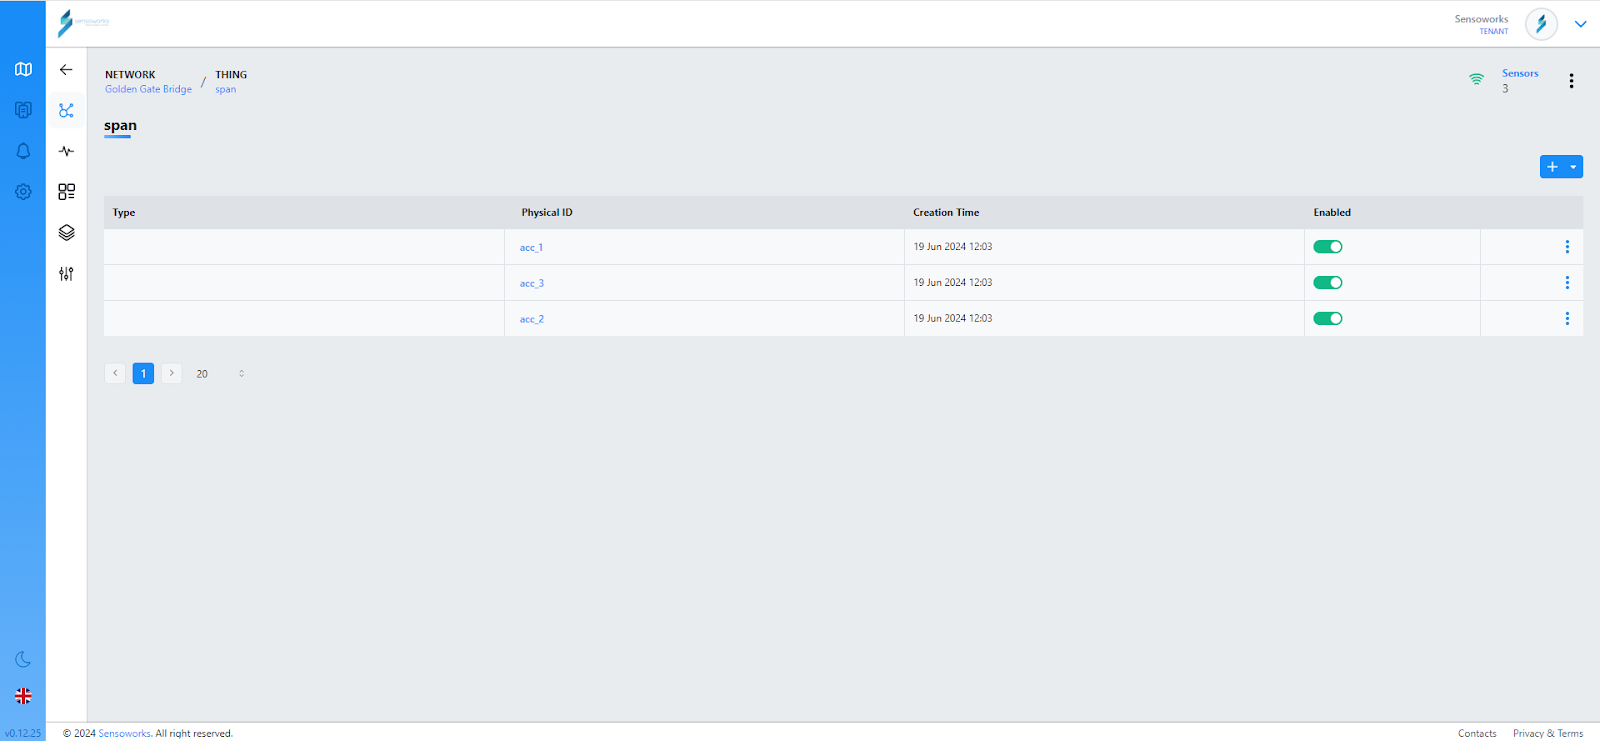
Remember to enable the devices by clicking on the toggle “Enabled” of each one.
Enabling auto provisioning
Sensoworks IIoT Platform supports the Auto Provisioning functionality that allows you to avoid defining the payload structure.
You can enable Auto Provisioning as follow:
-
return to the “Networks” section by clicking on “Networks” menu item on the left menu bar.
-
click on “Golden Gate Bridge” Network context menu, then “Autoprovisioning” and confirm;

Thanks to the Auto Provisioning functionality you can start sending data from your accelerometers!
4. Notifications
5. Settings
6. Configurations
Customize Theme
To configure your company or product logo and colour scheme, go to the “Configuration” page, then click on “Theme”.
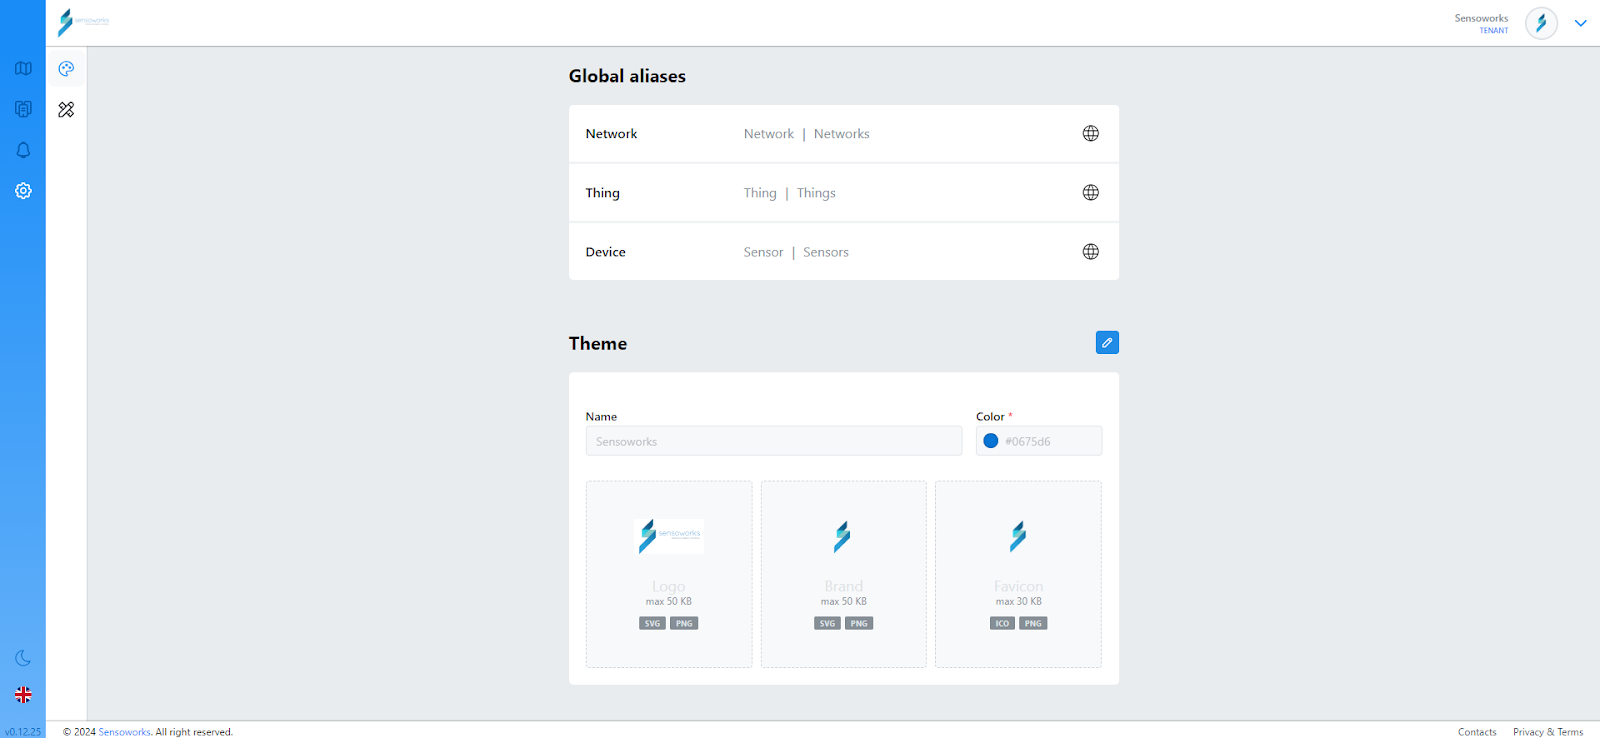
By clicking on the pencil icon you can upload your logo, brand and favicon. You can also change color by setting hex code or just picking it through color picker.
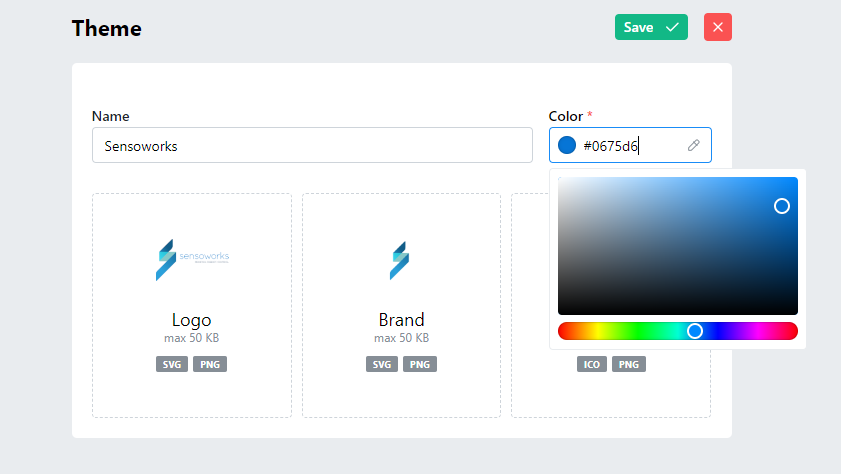
You can name your theme in the Name field and click on Save.
Global Aliases
In the Global Aliases section you can configure translation for Network, Thing and Device. Currently Sensoworks IIoT Platform supports english and italian for translation.
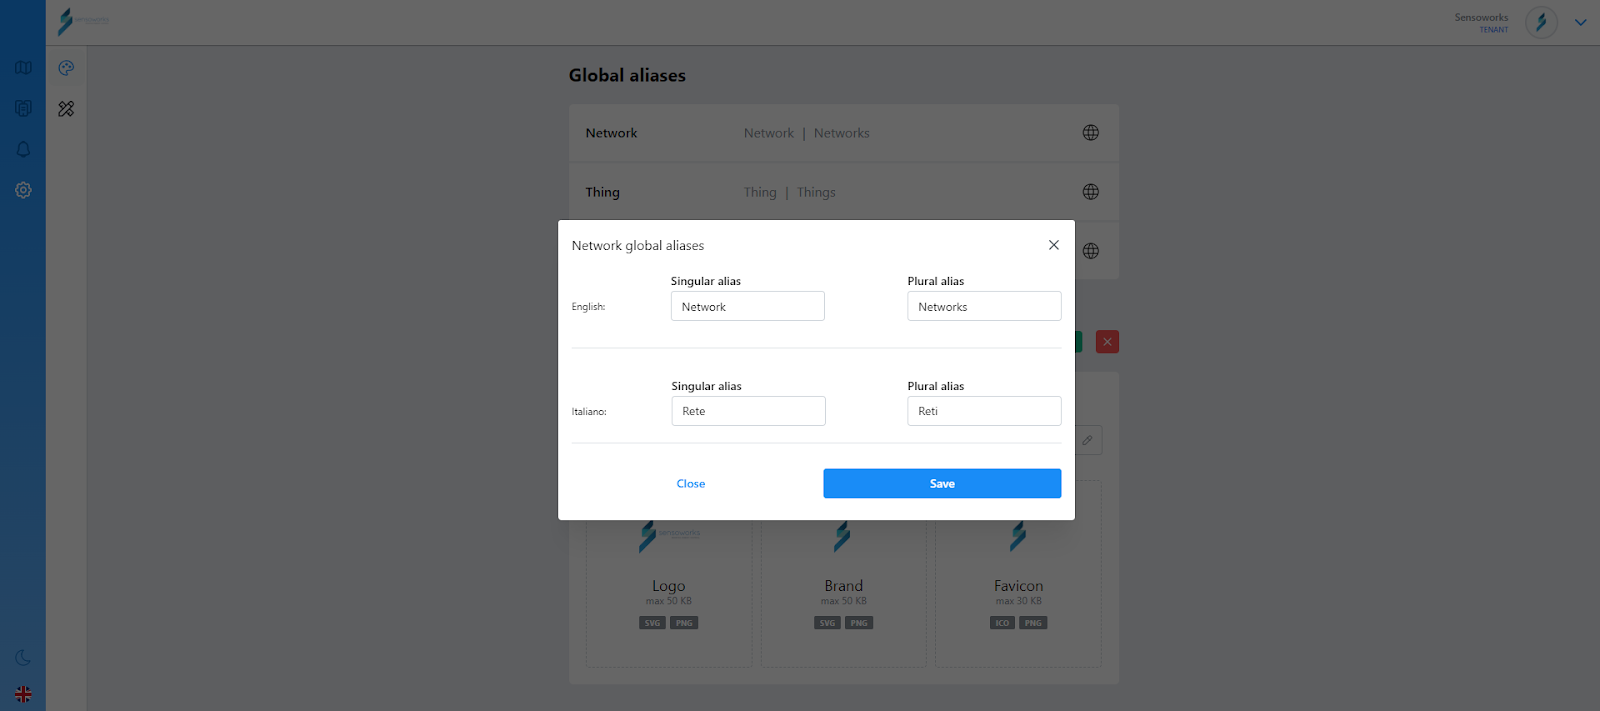
Global Aliases is used just to translate labels for Network, Thing, Device, in the navigation menu in Sensoworks Desk, the web console.
Presets
Overview
Sensoworks’s web console, Desk, allows you to define what we call “presets”. A preset is used to customize an entity with both aliases and parameters. The aliases will replace the default: ‘Network’, ‘Thing’, ‘Device’ naming conventions globally. The parameters are custom fields which an entity will be initialized with.
To access Presets page on Desk you can click on “Configurations” menu item on the left bar, then “Presets”.
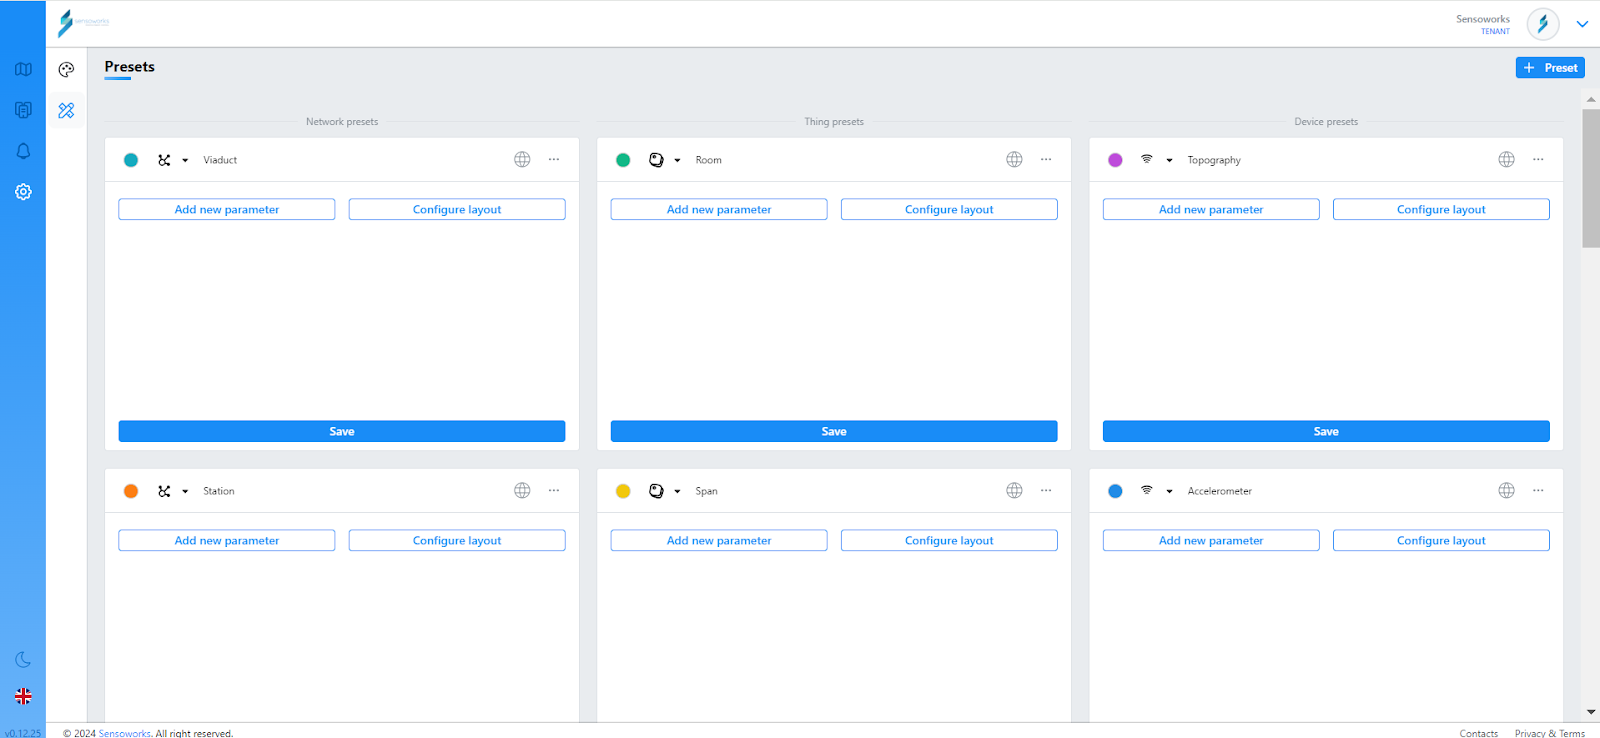
The image above shows a list of Presets defined on a demo environment. If it’s the first time you access this page on a fresh installation, this page is empty. You can proceed on the next sections to configure presets for Network, Thing and Device.
Create a new preset
To create a new preset just click on the “+ Preset” button in the top right corner.
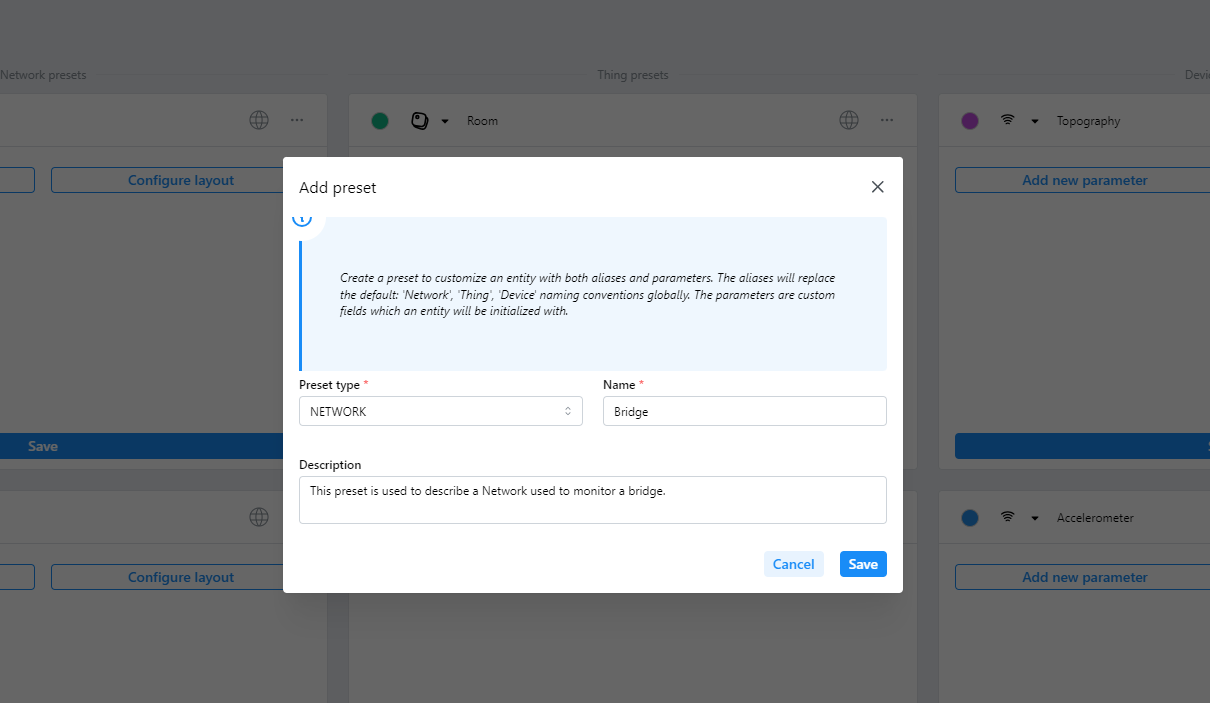
Under “Preset type” choose if you want to create a preset for a Network, a Thing or a Device. In this example we are creating a preset called “Bridge” for a Network. Click on Save to create the preset.
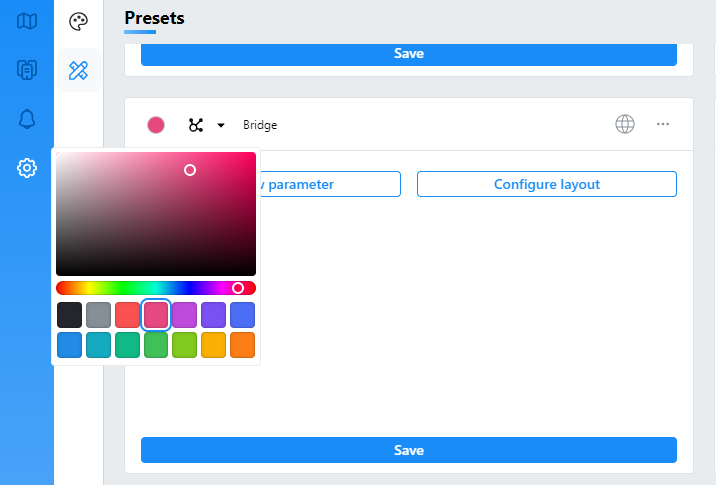
Change default color
Once you create the preset “Bridge” for a Network, you can change its color by clicking on the white circle on the top left side corner of the preset card. Then you can select the color you prefer.
Preset localisation
A preset name can be localised in english or italian. You can click on the hearth icon in the top right corner of the preset card.
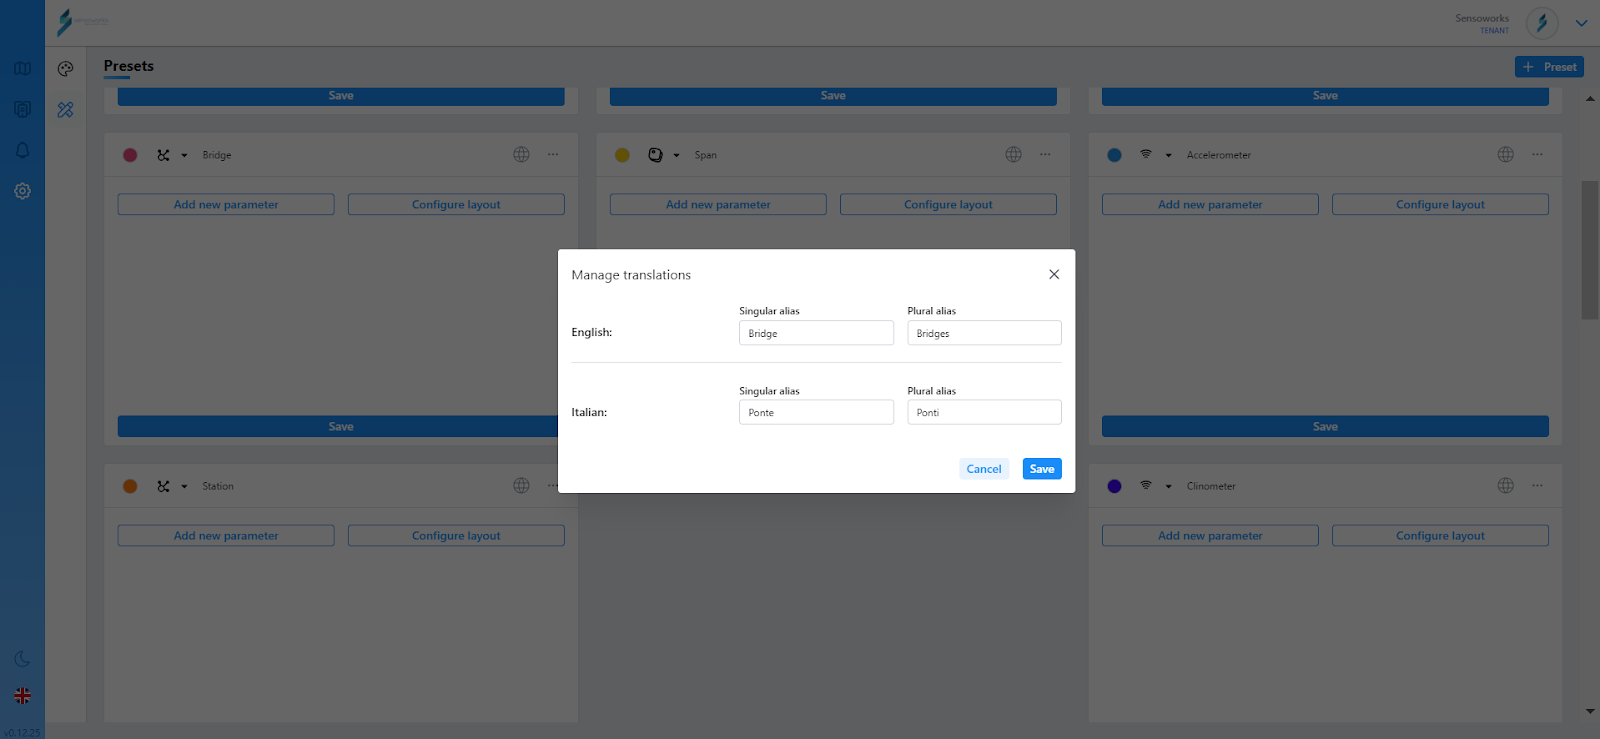
Insert the translation you want the system uses to localise the entity, in this case a Network, the preset will be applied to.
Add parameter
Presets allows you to globally define static parameters for entities the preset will be applied to. It’s a sort of custom metadata which cannot be modified except from the console.
By clicking on “add parameter” inside preset card you can define the type of the parameter, its name and its value
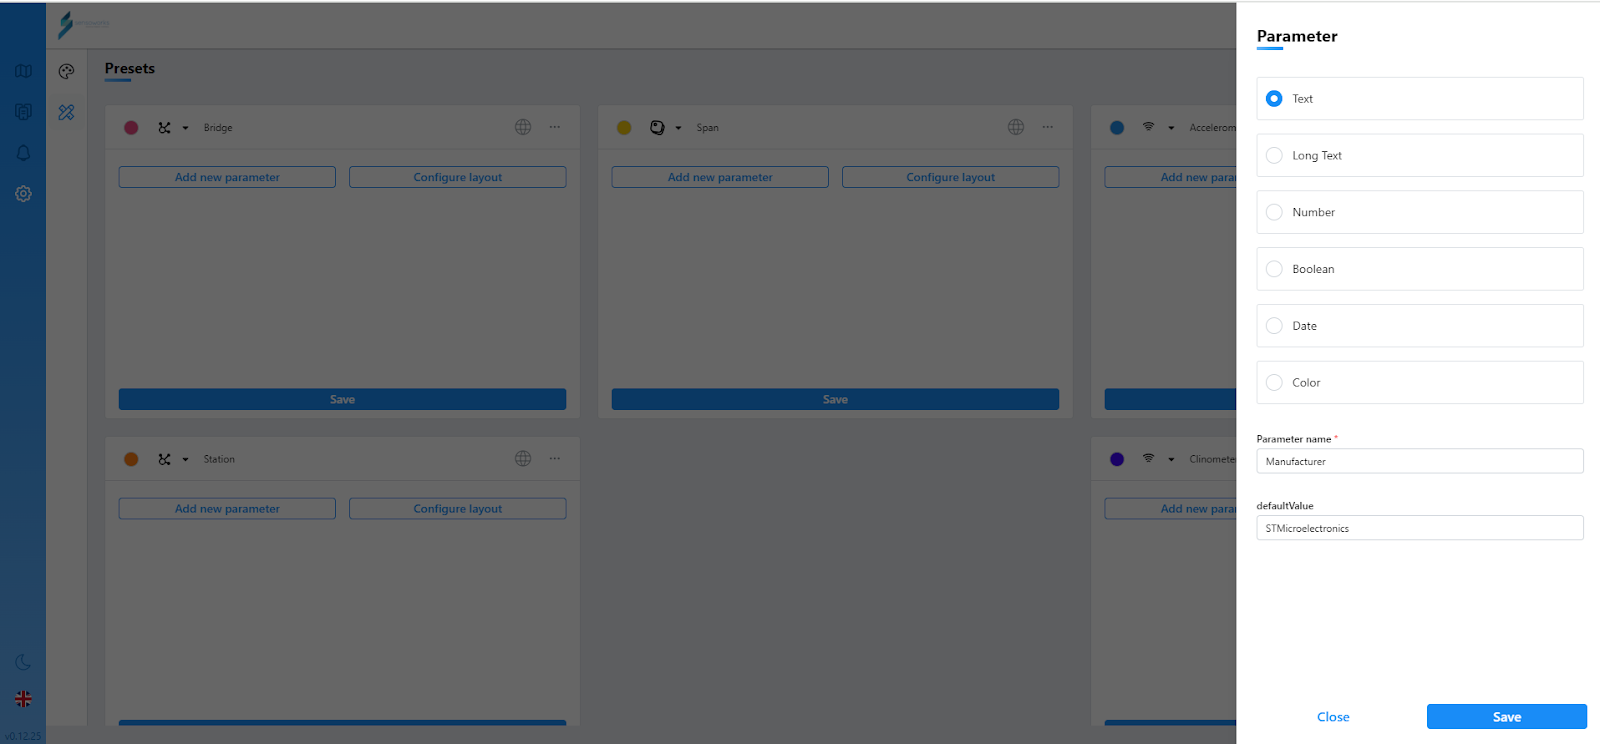
In the example above we create a Text parameter with name equal to “Manufacturer” and value equal to “STMicroelectronics”. This parameter will be applied to each device to which the preset “Accelerometer” is applied.
Assign preset to an entity
To assign a preset to an entity, for example to a Network you can follow these steps:
-
click on Networks menu item on the left;
-
click on the context menu for your network, in this example “Golden State Bridge”, then click on Edit.

- you can move until the Configuration step by clicking on next. Once you reach the Configuration step, you can choose your preset in the “Type” combo box. In this example we select the network preset “Bridge” we created before. Then click on save.
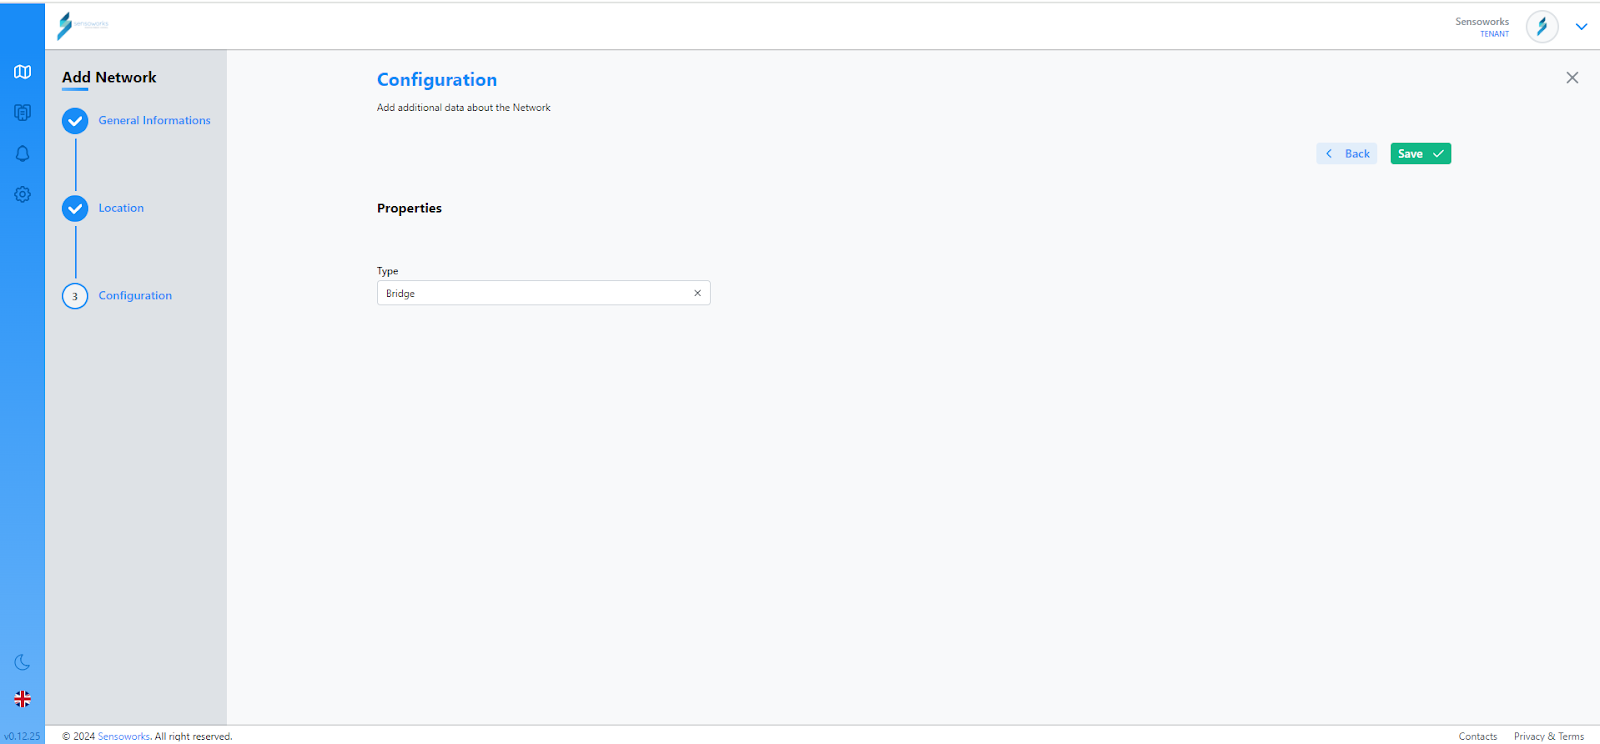
As a result of applying the preset Bridge to the network Golden State Bridge you can see a label under the column “Type” for the network in the Networks page.
You can apply presets also to Thing and to Devices. For example you want to apply the preset “Accelerometer” that we previously created to the device “acc_1” under the Thing “span” inside the Network “Golden Gate Bridge”. To do so, you can follow these steps:
-
in Networks page click on “Golden Gate Bridge” Network;
-
click on “span” Thing inside the “Golden Gate Bridge” Network to reach the device list.
-
click on “acc_1” Device then click on “More actions” in the top right corner and click on “Edit”;
-
select from “Type” combo the “Accelerometer” preset then click on save.

As a result of applying the preset Accelerometer to the device “acc_1” you can see a label under the column “Type” for the device in the “span” Thing.
7. Edges
Overview
For the data ingestion, edges must be created on the platform. Once an edge is created, it is possibile to send data to the platform with the associated token.

Edge creation
To create an edge, click on the top-right button ”+ Edge” and insert a name. An edge will be created and you can activate or deactivate it by clicking on the 3 dots menu in the corresponding row.
You can copy a token to use in the ingestion API calls by clicking in the “Token” column of every edge row.